
Replacing a failing hard drive in FreeNAS
Recently I started to receive notifications from FreeNAS indicating smart errors on one my hard drives. A quick check of the system log confirms a number of smart errors on /dev/da4.
root@freenas:/var/log # grep smart /var/log/messages
Feb  1 03:39:51 freenas smartd[2739]: Device: /dev/da4 [SAT], previous self-test completed with error (read test element)
Feb  1 03:39:51 freenas smartd[2739]: Device: /dev/da4 [SAT], Self-Test Log error count increased from 0 to 1
Feb  4 21:46:05 freenas smartd[48304]: Device: /dev/da4 [SAT], previous self-test completed with error (read test element)
Feb  4 21:46:05 freenas smartd[48304]: Device: /dev/da4 [SAT], previous self-test completed with error (read test element)
Feb  4 21:47:00 freenas smartd[48927]: Device: /dev/da4 [SAT], previous self-test completed with error (read test element)
Feb  4 21:47:00 freenas smartd[48927]: Device: /dev/da4 [SAT], previous self-test completed with error (read test element)
Feb  5 06:17:00 freenas smartd[48927]: Device: /dev/da4 [SAT], previous self-test completed with error (read test element)
Feb  5 06:17:00 freenas smartd[48927]: Device: /dev/da4 [SAT], Self-Test Log error count increased from 1 to 2
Feb  5 06:17:00 freenas smartd[48927]: Device: /dev/da4 [SAT], previous self-test completed with error (read test element)
Feb  5 06:17:00 freenas smartd[48927]: Device: /dev/da4 [SAT], Self-Test Log error count increased from 1 to 2
Pulling up the smart information available for /dev/da4 confirms the recent read errors.
root@freenas:~ # smartctl -a /dev/da4
SMART Attributes Data Structure revision number: 16
Vendor Specific SMART Attributes with Thresholds:
ID# ATTRIBUTE_NAME          FLAG     VALUE WORST THRESH TYPE      UPDATED  WHEN_FAILED RAW_VALUE
  1 Raw_Read_Error_Rate     0x002f   200   200   051    Pre-fail  Always       -       0
  3 Spin_Up_Time            0x0027   140   140   021    Pre-fail  Always       -       15000
  4 Start_Stop_Count        0x0032   100   100   000    Old_age   Always       -       163
  5 Reallocated_Sector_Ct   0x0033   200   200   140    Pre-fail  Always       -       0
  7 Seek_Error_Rate         0x002e   200   200   000    Old_age   Always       -       0
  9 Power_On_Hours          0x0032   005   005   000    Old_age   Always       -       69621
 10 Spin_Retry_Count        0x0032   100   100   000    Old_age   Always       -       0
 11 Calibration_Retry_Count 0x0032   100   100   000    Old_age   Always       -       0
 12 Power_Cycle_Count       0x0032   100   100   000    Old_age   Always       -       128
192 Power-Off_Retract_Count 0x0032   200   200   000    Old_age   Always       -       79
193 Load_Cycle_Count        0x0032   170   170   000    Old_age   Always       -       92692
194 Temperature_Celsius     0x0022   114   099   000    Old_age   Always       -       38
196 Reallocated_Event_Count 0x0032   200   200   000    Old_age   Always       -       0
197 Current_Pending_Sector  0x0032   200   200   000    Old_age   Always       -       0
198 Offline_Uncorrectable   0x0030   200   200   000    Old_age   Offline      -       0
199 UDMA_CRC_Error_Count    0x0032   200   200   000    Old_age   Always       -       0
200 Multi_Zone_Error_Rate   0x0008   200   200   000    Old_age   Offline      -       28

SMART Error Log Version: 1
No Errors Logged

SMART Self-test log structure revision number 1
Num  Test_Description    Status                  Remaining  LifeTime(hours)  LBA_of_first_error
# 1  Extended offline    Completed: read failure       10%      4094         3907016230
# 2  Short offline       Completed: read failure       60%      3995         3907016230
# 3  Short offline       Completed without error       00%      3271         -
# 4  Short offline       Completed without error       00%      2545         -
# 5  Short offline       Completed without error       00%      1826         -
# 6  Short offline       Completed without error       00%      1091         -
# 7  Short offline       Completed without error       00%       371         -
# 8  Short offline       Completed without error       00%     65219         -
# 9  Short offline       Completed without error       00%     64476         -
#10  Short offline       Completed without error       00%     63757         -
To see all available disks in the system run camcontrol devlist
root@freenas:~ # camcontrol devlist
<ATA HGST HDN726040AL W7JH>        at scbus0 target 1 lun 0 (pass0,da0)
<ATA HGST HDN726040AL W7JH>        at scbus0 target 2 lun 0 (pass1,da1)
<ATA HGST HDN726040AL W7JH>        at scbus0 target 3 lun 0 (pass2,da2)
<ATA WDC WD2002FAEX-0 1D05>        at scbus0 target 4 lun 0 (pass3,da3)
<ATA WDC WD2002FAEX-0 1L01>        at scbus0 target 5 lun 0 (da4,pass4)
<SanDisk Ultra Fit 1.00>           at scbus8 target 0 lun 0 (pass5,da5)
<SanDisk Ultra Fit 1.00>           at scbus9 target 0 lun 0 (pass6,da6)
The first step is to shut down this disk in preparation of replacement.
root@freenas:~ # camcontrol stop da4
Unit stopped successfully
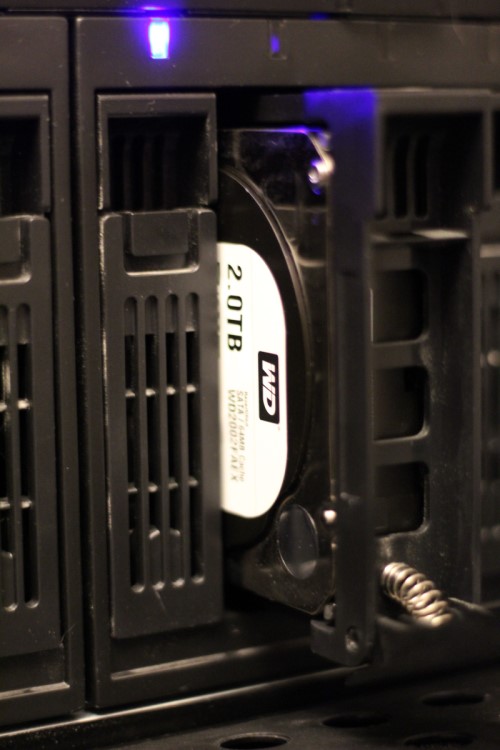
Now that the drive has been stopped, simply pull the drive sled and let hot swap do its thing.
dmesg output shows the device being disconnected from the system.
root@freenas:~ # dmesg | grep da4
da4 at mps0 bus 0 scbus0 target 6 lun 0
da4: <ATA WDC WD2001FASS-0 1D05> Fixed Direct Access SPC-4 SCSI device
da4: Serial Number WD-WMAY00665824
da4: 300.000MB/s transfers
da4: Command Queueing enabled
da4: 1907729MB (3907029168 512 byte sectors)
        (da4:mps0:0:6:0): WRITE(10). CDB: 2a 00 d7 62 b4 b0 00 00 10 00 length 8192 SMID 304 terminated ioc 804b loginfo 31110d00 scsi 0 state c xfer 0
(da4:mps0:0:6:0): WRITE(10). CDB: 2a 00 d7 62 b4 b0 00 00 10 00
(da4:mps0:0:6:0): CAM status: CCB request completed with an error
(da4:mps0:0:6:0): Retrying command
da4 at mps0 bus 0 scbus0 target 6 lun 0
mps0: da4: <ATA WDC WD2001FASS-0 1D05> s/n WD-WMAY00665824 detached
(da4:mps0:0:6:0): WRITE(10). CDB: 2a 00 d7 62 b4 b0 00 00 10 00
(da4:mps0:0:6:0): CAM status: CCB request aborted by the host
(da4:mps0:0:6:0): Error 5, Periph was invalidated
GEOM_MIRROR: Device swap0: provider da4p1 disconnected.
(da4:mps0:0:6:0): Periph destroyed
FreeNAS will now show an alert indicating a disk has been removed.

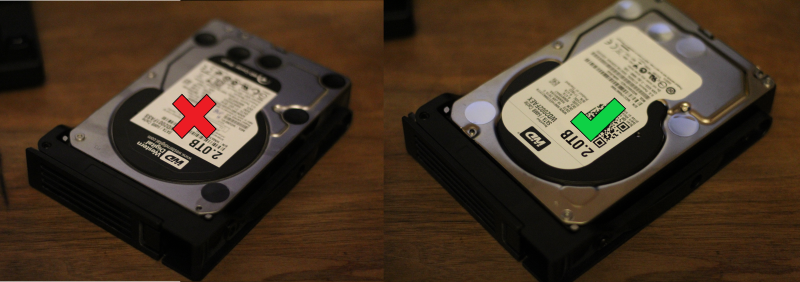
Remove the failing hard drive from the drive sled and add in the replacement drive.
Once the drive sled is reinstalled into the hot swap bay, dmesg can once again be used to confirm the system has detected the new drive.
root@freenas:~ # dmesg | grep da4
da4 at mps0 bus 0 scbus0 target 5 lun 0
da4: <ATA WDC WD2002FAEX-0 1L01> Fixed Direct Access SPC-4 SCSI device
da4: Serial Number WD-WCC1P0987690
da4: 600.000MB/s transfers
da4: Command Queueing enabled
da4: 1907729MB (3907029168 512 byte sectors)
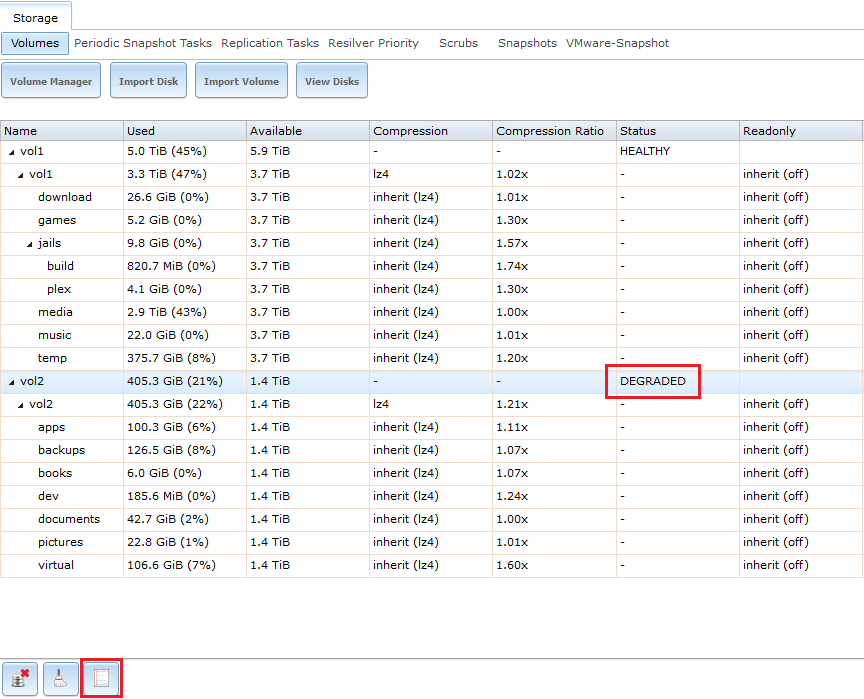
To complete the replacement process, login to FreeNAS, click the Storage button. Select the volume with the degraded status. Click the Volume Status button at the bottom.
In the Volume Status window, select the disk with the removed status. Click the Replace button at the bottom.
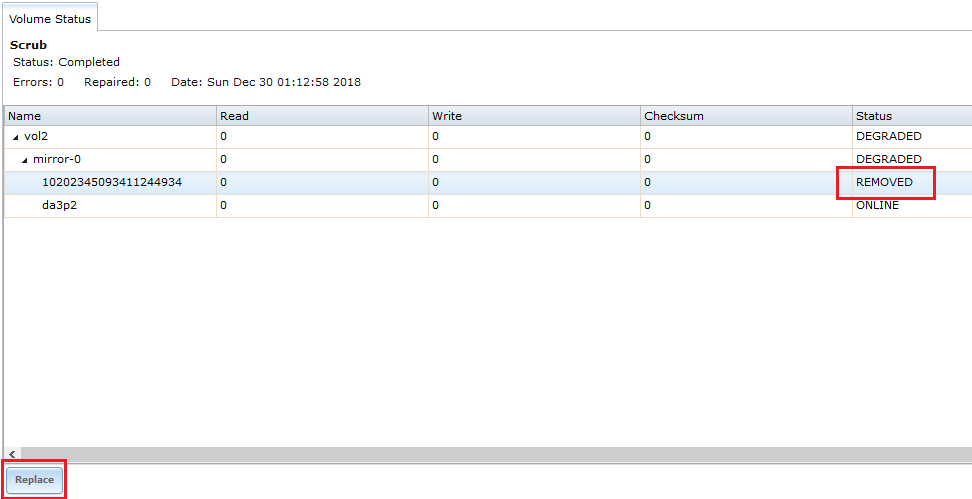
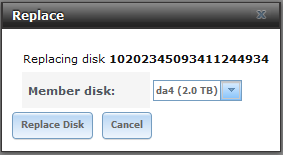
Now select the new disk as the member disk and click the Replace Disk button.
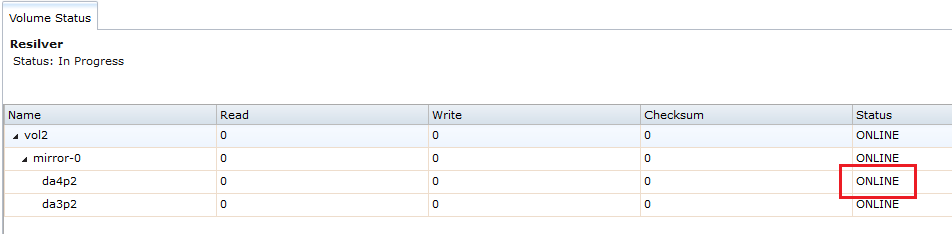
If all went well the new disk will be added to the volume with an online status. The volume status will appear as Resilver with a status of In progress.
Lastly, FreeNAS will show one more Critial “everything is ok” alert. Let the resilver process complete and this alert will clear on its own.

- See all smart errors in the system log:
grep smart /var/log/messages - See all available smart information for a specific device:
smartctl -a /dev/da4 - See a list of all hard drive devices in the system:
camcontrol devlist - Stop a specific hard disk:
camcontrol stop da4 - See system information after removing or adding a disk:
dmesg | grep da4
- Click Storage.
- Select the degraded volume.
- Click the Volume Status button at the bottom.
- Select the disk with the removed status.
- Click the Replace button at the bottom.
- Select the new member disk.
- Click the Replace Disk button.